While the heel lock lacing method of tying shoes might be familiar to longtime runners, I’d say a majority of people have no idea what it is, let alone how to go about tying a heel lock (lace lock).

This visual guide will show you step-by-step, exactly how I heel lock lace my boots so that you can get all the benefits of this trusty, underrated boot and shoe lacing method.
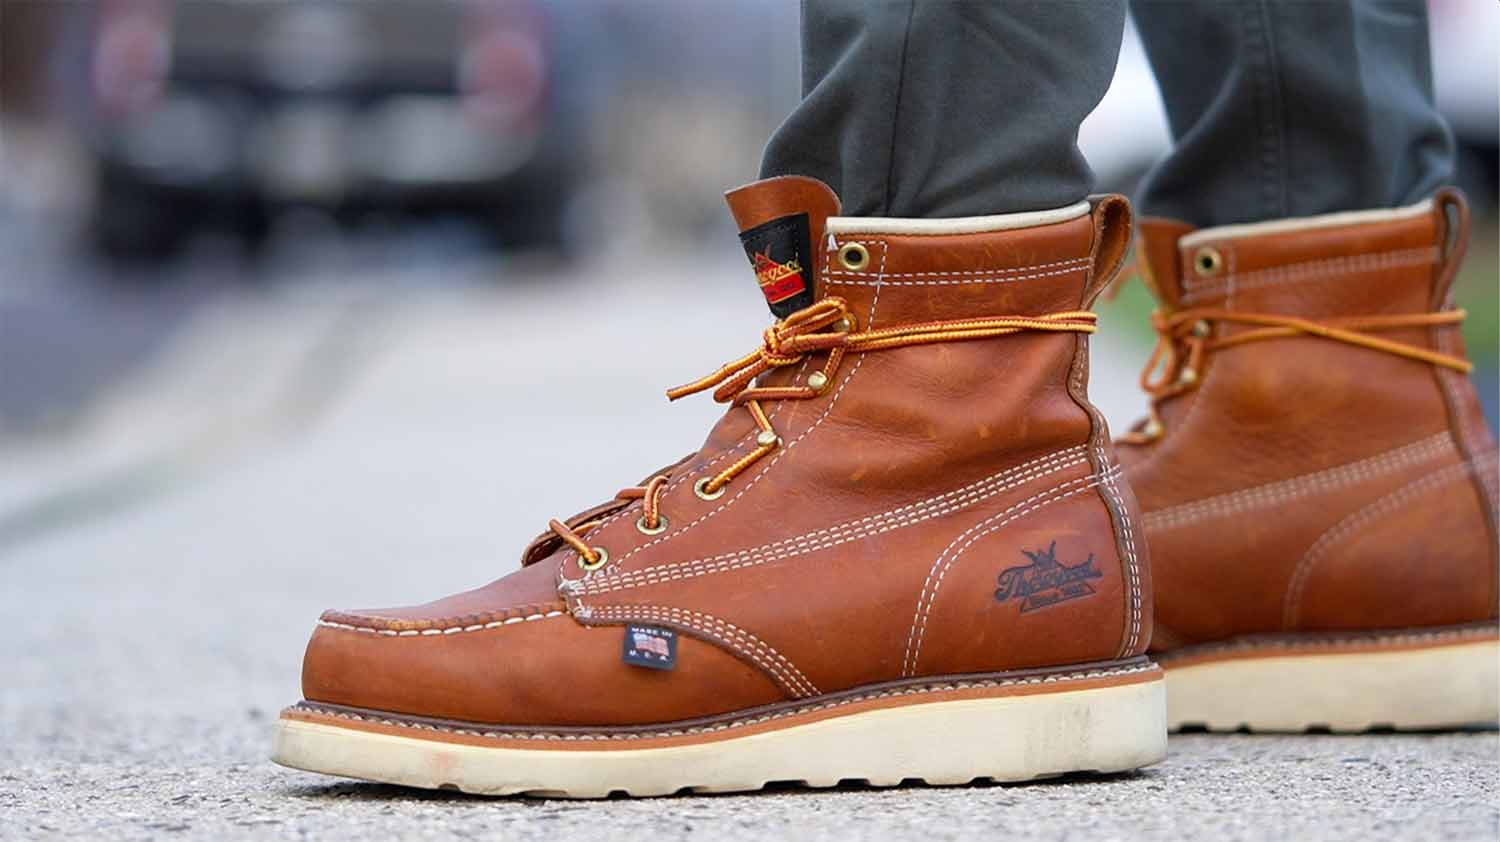
While this demonstration features a pair of work boots (Thorogood USA) with speed hooks, the heel lock lacing technique can be achieved without them too.
Let’s get started.
Subscribe to the Gentleman Within YouTube channel.
If you’re more of a visual learner, hit the play button to watch the video presentation above.
What Is Heel Lock Lacing?
Heel lock lacing is a shoe tying method that (as its name suggests) locks the heel into place to help prevent heel slippage so that your toes don’t get jammed into the front of your boot or shoe.
It’s the best shoe lacing method I know of to aid in preventing nasty blisters and dreaded purple or black toenails. Furthermore it’s an ideal lacing method for activities like running or hiking.
Why Use Heel Lock Lacing?
Runners already know the benefits of heel lock lacing. A heel lock lace is super simple to achieve and the benefits are tremendous.
The 3 primary benefits:
- Helps prevent your heel from slipping by locking your heel and foot into place
- Creates a super tight and securely finished knot
- Provides extra rear foot stability and room for your toes
Related: If you’re enjoying this article, then you might like this article on Boot Styles for Men too.
How To Heel Lock Lace Your Boots (Or Shoes)
Here I’ve provided 4 quick and simple steps to achieve the heel lock. I’ve also provided gifs that go along with each step to help for those who prefer visual learning.
Step 1:
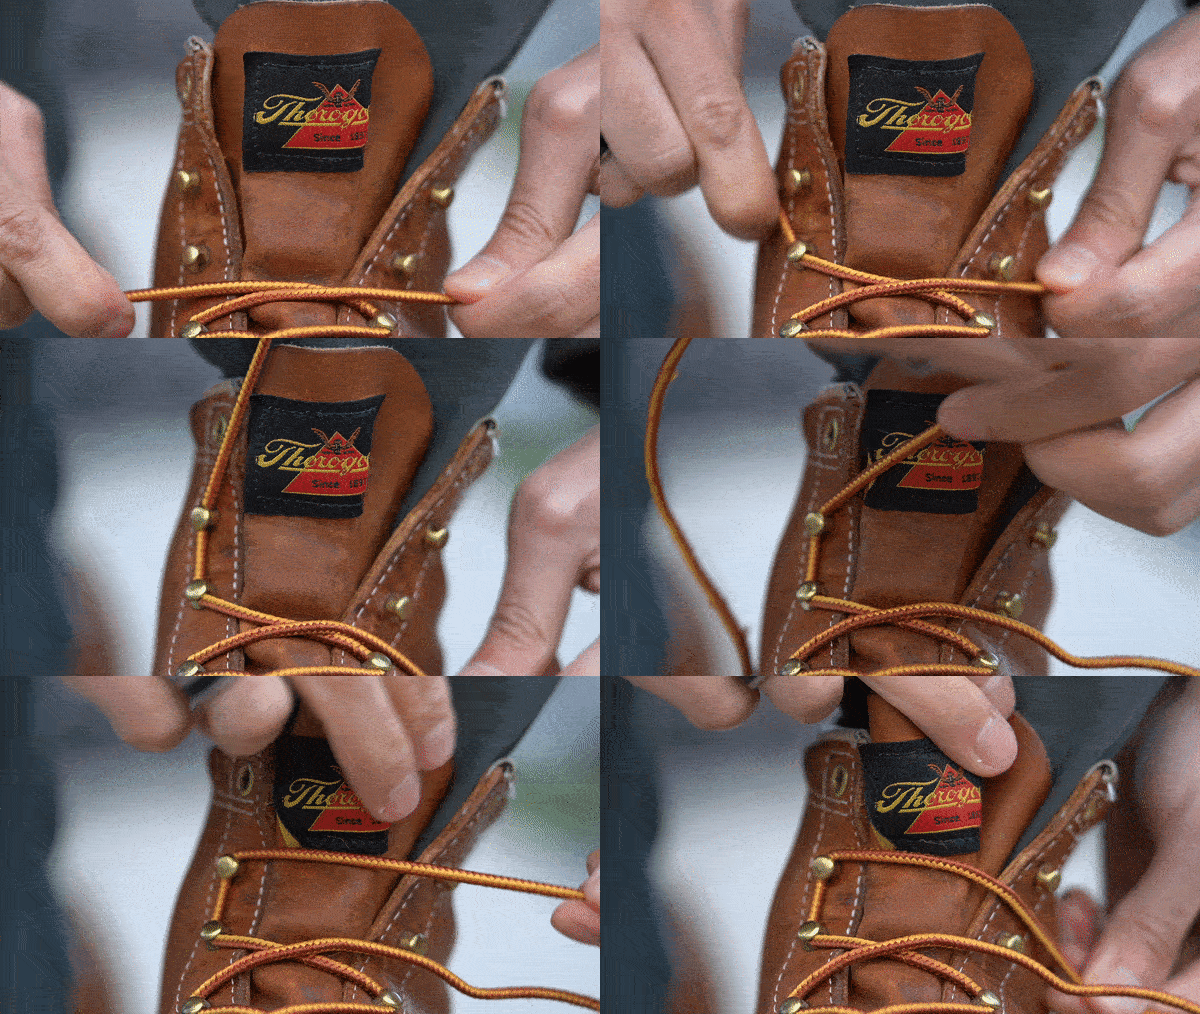
First you crossover lace as normal until you reach the final 2 speed hooks on each side. Start by fastening the lace to both speed hooks on whichever side you like, then cross the lace over to the other side.
Step 2:
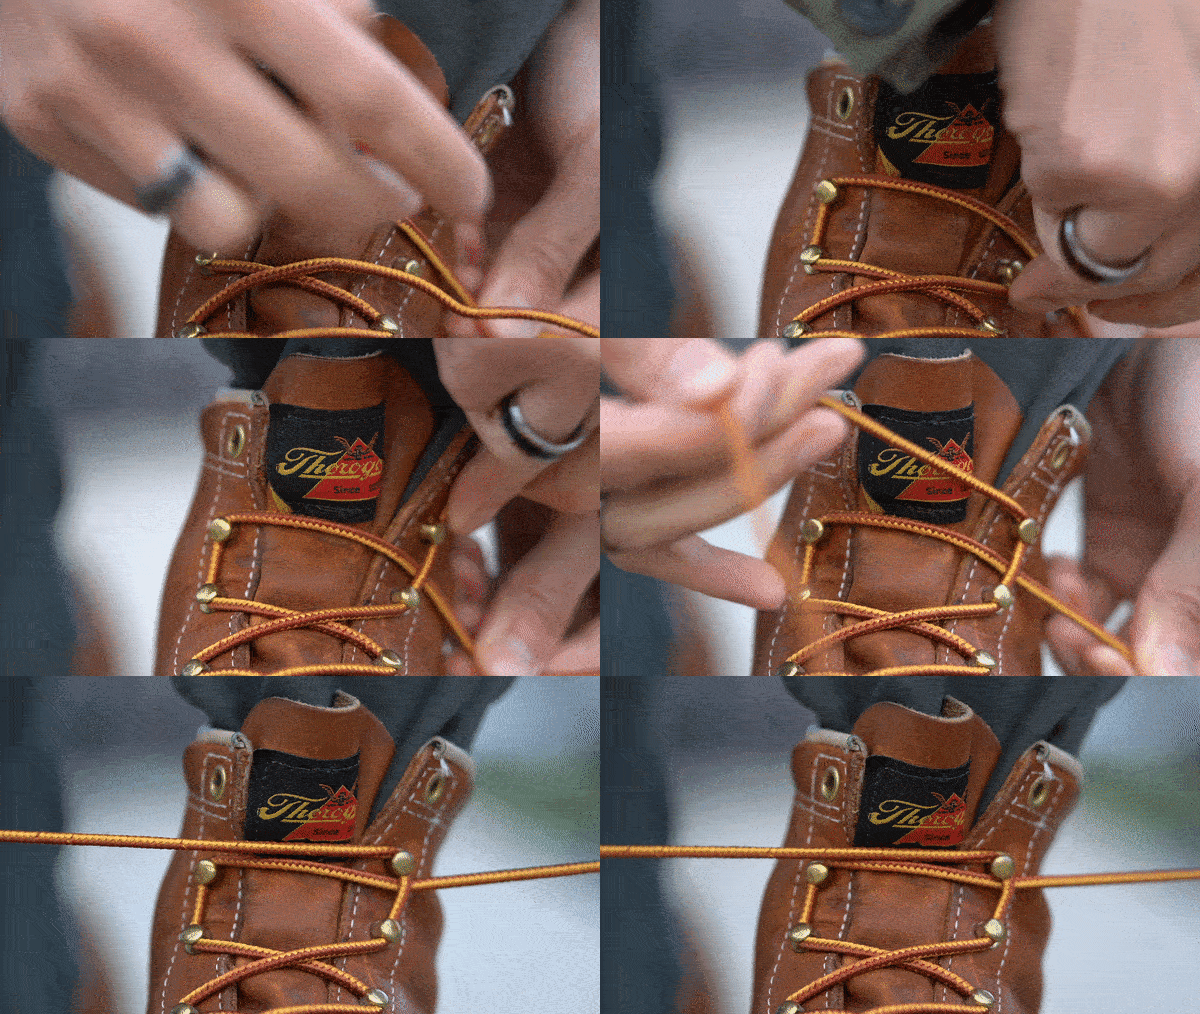
Next, you slide the laces up both speed hooks on the other side, going overtop of the lace that you crossed over in the previous step.
Step 3:

Third, where the magic happens. You take the lace that you just fastened and cross that over to the other side, sliding beneath the vertical lace and pulling all the way through. It should look something like a frog’s face.
Step 4:
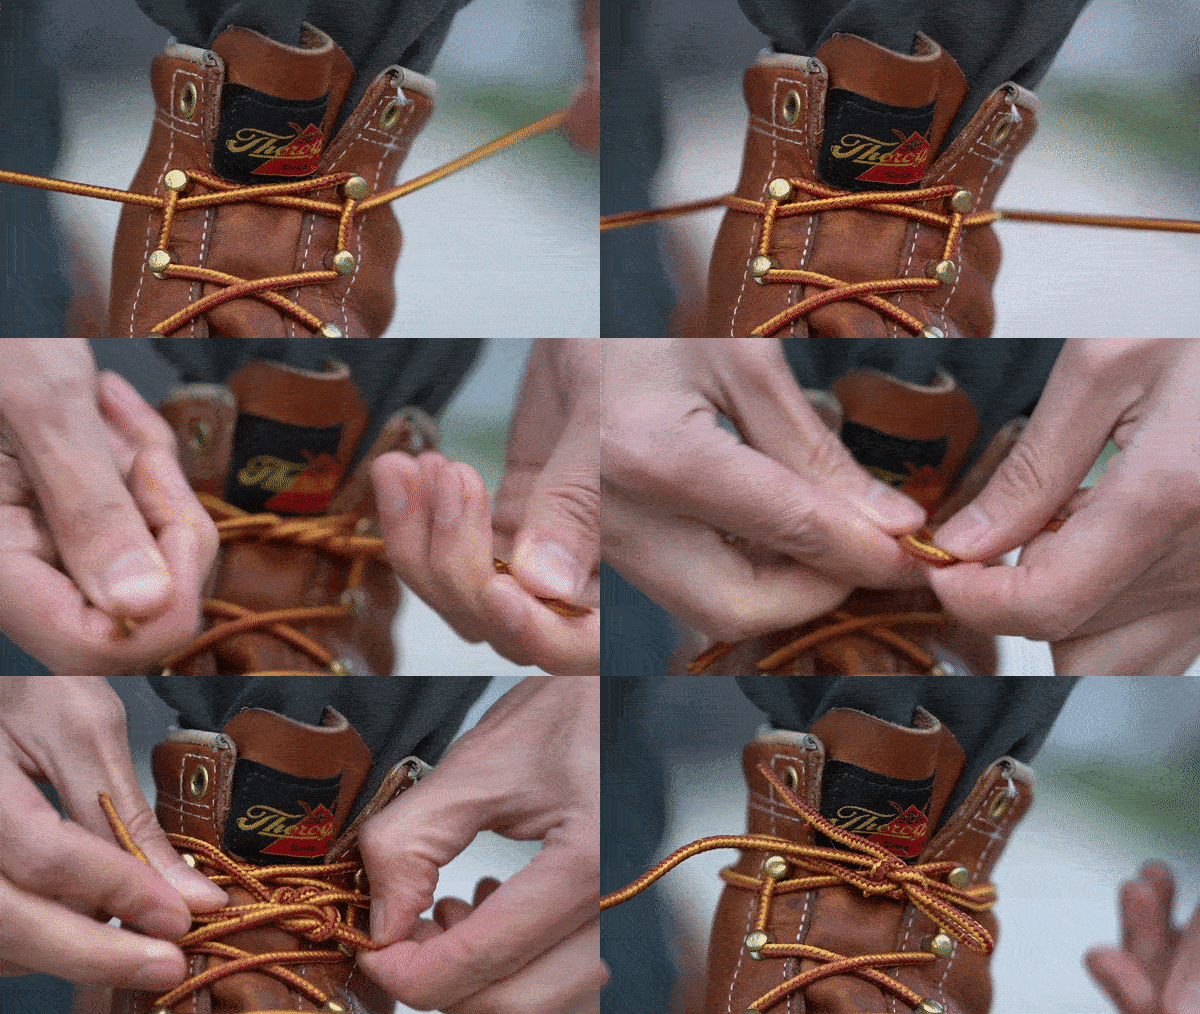
Finally, it’s time to put the finishing touches on and lace ’em up! You could now tie your shoes as normal, but when the laces are long enough, I like to wrap my laces around the back of the boots and then finish the knot. I think it looks pretty cool and provides a bit more support above the ankle. Voila!
Wrapping Things Up
And there you have it, how I heel lock lace my boots and how you can too. Let me know if there are other shoe/boot tying methods that I should be aware of in the comments below!
Thanks for reading and I hope you enjoyed this article as much as I enjoyed putting it together. Before you leave, you might like the following boot reviews.

WHAT ARE YOUR THOUGHTS ON THE HEEL LOCK LACING METHOD?
To continue the discussion, come and join the Gentlemen Within Private Facebook Community.
Looking forward to seeing you in there.
LIKE WHAT YOU READ?
Get more posts like this plus style tips & advice delivered straight to your inbox.


Drop a Line!